(updated March 2024 )
We’ve been building cameras for over 2 years, capturing image data for testing purposes and working with it to see what our customers can do with it. Delve into the process of photogrammetry with us and discover what’s been easy, difficult, and how we can help.
Mosaic CEO explains how we create our 3d models with photogrammetry
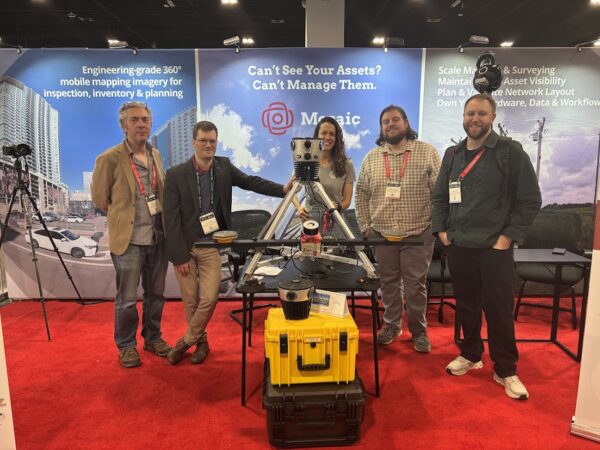
Hi. I am Jeffrey Martin, one of the co-founders of Mosaic. I’m an obsessive photographer, and I also help to guide the evolution of our products and services. These days we are working more and more on the process of creating detailed, large-scale 3d models of neighborhoods and towns, using our 360º mobile mapping cameras, the Mosaic 51, Mosaic X, and Mosaic Viking.
Following the fantastic response to the 3D photogrammetric scans which we have been publishing, and the desire from our audience to learn more, we thought it would be a good idea to write a basic introduction to what photogrammetry is, how to do it, why it’s easy, why it’s hard, why we are automating it, and how we can help you make large 3d models and measurements of the world.
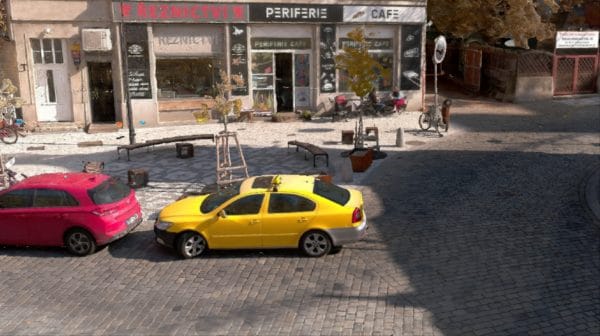
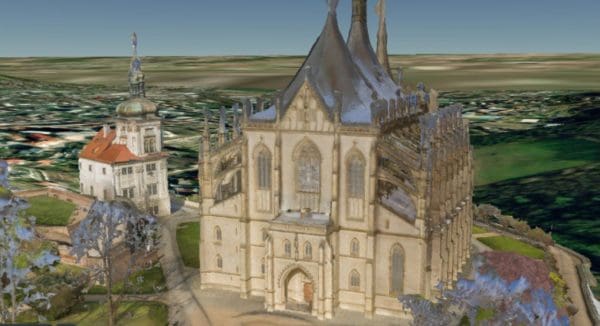
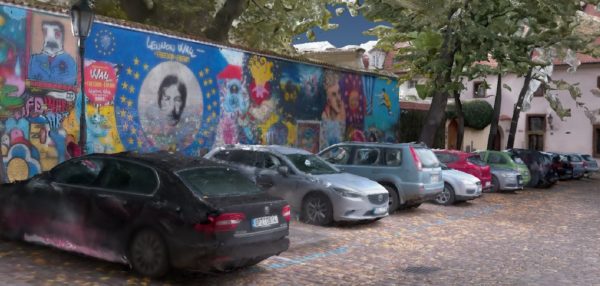
Check out some of our 3d models and reconstructions, all done with 100% pure photogrammetry.
(Click on each image and you’ll be able to move around the model.)
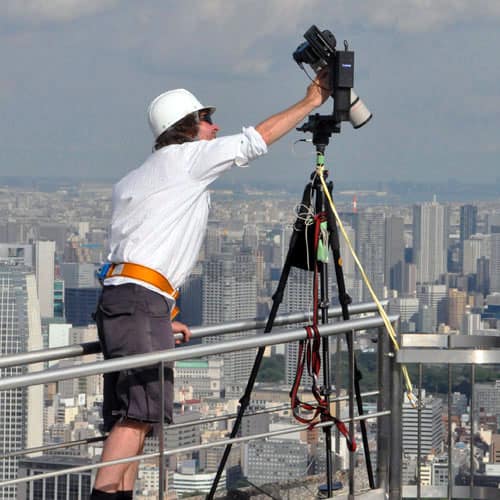
I’ve been a professional photographer for around 20 years now, concentrating mostly on 360-degree photography and gigapixel photography. These branches of photography are very technical, and it is not uncommon for 360º photographers to gain a deep understanding of the minutiae of camera sensor behavior, camera lens distortion, lens projection types, and other things that many photographers don’t really need to know about to do a good job.
Like 360º photography, Photogrammetry is equally technical, and it is helpful to have a solid understanding of these basic elements of photography:
- Lens focal lengths
- Depth of field
- Circle of confusion
- Lens distortion
- Rectilinear vs. Fisheye lens projections (not the same as distortion! A common misconception)
What is Photogrammetry?
Photogrammetry is the process of using multiple photographs to measure objects. These days, the idea is taken to its logical extreme, such that every pixel of every photograph is measured in comparison to nearby photographs of the same object, allowing us to create a complete 3D model (point cloud, mesh, etc.)
Like many other inventions, we can trace the seeds of photogrammetry back to Leonardo da Vinci, who published his research on perspective and projective geometry in the 1490’s. But Leonardo, being who he was, didn’t take this research all the way to completion. (He started lots of stuff but had trouble finishing anything…)
According to Britannica, “As early as 1851 the French inventor Aimé Laussedat perceived the possibilities of the application of the newly invented camera to mapping, but it was not until 50 years later that the technique was successfully employed.” Although 16 years later, the term “Photogrammetry” was coined by Albrecht Meydenbauer and Otto Kersten (PDF link).
In plain English, this is (a very, very simplified) explanation of how photogrammetry software works:
- Given a dataset of images of an object, shot from multiple angles
- Keypoints are generated of each image (you can think of keypoints as bunches of unique points in each image)
- Images which are overlapping a lot, but shot from a different spot, should have features in them that are almost, but not quite, the same
- By comparing keypoints, the software determines the relative position of these images in relation to each other. This process is called Structure from Motion (SfM)
- When the position in 3d space of the photographs is determined, it is possible to then compare images, pair by pair, in detail, to determine the “depth” of each pixel in the image. This is called a “depth map”.
- Using these depth maps, the software determines the actual objects in three dimensions. This is called a “mesh” and it’s made of millions of triangles (it is possible to create a mesh from a dense point cloud rather than depth maps as well)
- Now that there is a bunch of solid three dimensional shapes, we can color them according to the colors in the original photos
- We now have a model which might be hundreds of millions of triangles. It might be necessary to simplify it by a few orders of magnitude while preserving as much detail as possible; it might also be desirable to determine other characteristics of different surfaces, including the opacity, the roughness, the albedo, and other things which determine how the object reacts to diffuse and specular lighting sources
How to do it – Creating 3D Models with Photogrammetry
In this article we will refer to Photogrammetry as the process of creating a 3D model from lots of photographs.
To make a 3D model from lots of photographs, this is how you can do it. Let’s say you want to scan a tree stump, or a sculpture made of sandstone….
- Walk around the object and take lots of photos
- Load the photos onto your computer
- Launch Meshroom, Colmap, Metashape, Reality Capture, Context Capture, Pix4D, DJI Terra, or whatever other photogrammetry software you have
- Drop the photos into the software
- Click “start”
- Wait for an hour or a week, depending on the size of your dataset, the speed of your computer, the speed of the software, and the reliability of any prior calibration that already exists
- Profit! 🙂
This is all there is to it.
OK, maybe this is too vague and you’d like more detail, right?
OK, there are a “few” additional points to consider.
- Using the highest resolution possible, shoot photos of your object
- Every photo should be shot from a different location in all three dimensions
- Every photo should have the maximum depth of field
- Every photo should be perfectly sharp
- The lens should be without any aberrations (chromatic aberration, coma, flare, or any strange type of lens distortion that can’t be corrected with a simple lens model is helpful)
- The photos should be low in noise. High ISO and noise reduction is not OK.
- Every photo should have an 80% overlap from one to another
- Every point in your subject should be visible from at least 4 different images
- Photos should not have any motion blur
- If using a fixed rig of cameras, calibrate it, such that your photogrammetry software understands that each set of images is made from a fixed set of images that is known. This increases the stability and accuracy of your alignment. The calibration should include the “intrinsics” of the camera lenses, i.e. the lens focal length, distortion parameters, optical center; it should also include the “extrinsics”, i.e. the position of the cameras relative to one another.
- Load these images into your photogrammetry software and click “start”
- Your photogrammetry software will first attempt to align the images to each other (Structure from motion) by figuring out the way images change from one to the next based on their large overlap
- After that, it can create a dense point cloud or mesh, and then it can put colors onto this 3d shape. And voila, now you have a dense 3d model. (We’re not going to talk about surface properties such as albedo, specularity, metalness, roughness, etc. in this post)
Now, if you are curious about learning the process in more detail, our wonderful internet is full of tutorials and primers on how to do it. I can suggest this one, by the brilliant and prickly Vladimir Kuzman.
Why it’s easy to create 3D Models with Photogrammetry
As you may have noticed from my instructions so far, after shooting your images, you just “load the images into the software and click start”.
If you have shot the images correctly, then you will in fact get a beautiful, richly detailed, millimeter-accurate 3d model.
If your subject is an easy type of subject, and you already know the basics of photography, and the environment where you’re shooting has an appropriate type of lighting, then the process is in fact easy and very straightforward. Of course, the world is not always the way we want it to be, and sometimes you have to make compromises.
As long as your subject matter is not too glossy, transparent, or featureless, then you can quite easily make a decent 3d model. If your lighting is flat and even in every direction, you can make a good model easily.
Here is one of the first 3D models I made using photogrammetry. I shot this with a Canon 5DS (50 megapixels) and a canon f/2.8 28mm lens (not a great lens, not a terrible lens). I used a tripod, I used ISO 100, and I used f/11 aperture to keep all of the important stuff in focus.
This model result was good enough to make a miniature 3d print!
So, if you’re trying to make a photogrammetry model of a sandstone statue or tree trunk on a cloudy day (even using a mobile phone) then you’re in luck – it is really easy. In other cases, there are going to be compromises that you have to make.
Why it’s hard to create 3D Models with Photogrammetry
At Mosaic, we are not doing photogrammetry scans of sandstone statues or tree trunks on a cloudy day. We are scanning whole streets, neighborhoods and towns.
There are objects which are shiny or featureless.
The camera is moving all the time.
The lighting is changing all the time.
There is traffic.
We end up with thousands or tens of thousands of photos.
These are among the biggest issues which are the difference between an easy photogrammetry project which a beginner can do, to a complex and difficult project which can either have a bad result or good result, depending on how the data is collected and processed.
Post Processing with Photogrammetry
Another issue is that the quantity of photos involved can increase the processing time quadratically, not linearly.
So if you have double the number of images, the processing time can increase by a factor of four.
If you have four times the number of images, the processing time can increase by a factor of 16.
If your data doesn’t fit into your RAM or GPU all at once, then the processing time might increase by a factor of 10 or 100.
So without doing a few tricks, you might be facing a few months worth of computation for a dataset that is ten times larger than something that took a day to process. Again, we need to do a few tricks to optimize this.
Why we are automating it
Since starting Mosaic, we have made numerous experiments in photogrammetry, and how to create large-scale 3d models using our cameras, without using LIDAR (and even without using other sensor data such as IMU, GPS / GNSS / INS, etc.)
Photogrammetry using Photos vs. LiDAR
LiDAR devices come in many different price points, from a cheaper Velodyne puck (a few thousand dollars) to laser profiles such as Riegl or Z&F (used in Leica Pegasus and other products) costing hundreds of thousands of dollars.
In general, these devices are great tools for determining the shape of a 3d structure, but not colors. To get the colors (or “texture”), cameras are still used.
LiDAR can offer a faster data acquisition time, at the expense of a much higher cost, size, weight, personnel training, and general expertise. The more expensive ones can offer sub-millimeter resolution of objects, even while the scanning device is moving.
Generally, the higher end devices are used by surveying companies who need extreme accuracy, such as for use cases involving high speed rail, where every millimeter counts, where in some cases human lives can be at stake.
Additionally, LiDAR is also useful for scanning surfaces that do not have visible features, such as featureless walls. The inclusion of LiDAR into a 3d reconstruction workflow can be non-trivial, requiring substantial software solutions to match all of the LiDAR points to each other (via SLAM) and to match the camera data to the LiDAR data accurately.
Other techniques (NeRF, NeRV, BaRF, etc.)
There are some newer techniques emerging which do not use stereophotogrammetry or related techniques to create an environment which looks three dimensional. The one that is getting a lot of attention in 2022 is called Neural Radiance Fields, or NeRF. (There are related ones such as NeRV and BaRF but those are even more experimental).
NeRF is a technique that allows you to interpolate arbitrary 3d views of a scene, given a small number of photos as the input data. The result is a “fly through” video of the object, and the results can be surprisingly good (and fast). This field is evolving quickly, and it will soon become a viable technique for use cases that need something that looks good, with accuracy being not so important.
There are lots of videos about NeRF on youtube. This one is pretty good.
As of this writing, it’s still an experimental technique and not viable for production work.
So, in the end, Photogrammetry is Hard
How can we help you?
At Mosaic, we are obsessed with making it as easy as possible to collect street-level imagery for a number of different customers and industries. We want to make it simple to create 360-degree images and also to create large and complex 3d models of whole neighborhoods and towns.
Please contact us if you would like us to help you accomplish this!